Walk into almost any attic, basement, or storage closet and you will find a small museum of forgotten technology. There is usually a clock radio that once woke someone up for work every morning, a cassette player that fueled road trips, or a VCR that still holds a half-finished movie inside. Many of these devices end up discarded not because they are truly broken, but because no one remembers how to maintain them anymore.
Sometimes these forgotten machines surface in surprising places, like the swap table at an assisted living community’s common area, where residents pass along items that still have life left in them. Other times they emerge when a family member asks if you can “just take a look” at something that hasn’t worked since the 1990s.
Repairing old electronics is not about restoring museum-grade perfection. It is about extending usefulness, preserving memories, and resisting the idea that everything must be replaced the moment it stops working flawlessly. With a bit of care, patience, and respect for how these devices were built, many can be coaxed back into service.
This guide walks through the mindset, preparation, and practical steps needed to approach old electronics safely and effectively.
Understanding What Makes Old Electronics Different
Older electronics were designed in a very different economic and engineering environment. Devices were expected to last for years, sometimes decades, and were often built with thicker plastic housings, more robust switches, and components that could tolerate some wear.
However, this durability comes with complexity. Unlike modern devices that are sealed and modular, older electronics often contain mechanical parts, belts, springs, and discrete components that age in visible and unpredictable ways. Rubber dries out. Contacts oxidize. Grease thickens. Dust accumulates in places no one intended it to go.
That means failure is often physical rather than digital. A device may stop working not because its logic has failed, but because a switch no longer makes proper contact or a motor can no longer turn freely.
Understanding this helps frame repairs not as heroic acts of technical brilliance, but as careful processes of cleaning, observation, and gentle intervention.
Preparing the Right Tools and Workspace
Before touching a device, preparation matters.
A basic electronics maintenance kit should include:
- Flathead and Phillips screwdrivers in multiple sizes
- Tweezers for handling small components
- A soft brush or small paintbrush
- A can of compressed air
- Cotton swabs
- Isopropyl alcohol (preferably 90% or higher)
- A magnifying glass or head-mounted magnifier
- A small tray or magnetic mat to hold screws
Equally important is the workspace itself. Work on a clean, well-lit surface with enough room to organize parts. Avoid carpets or cluttered areas where tiny screws can disappear permanently. Good lighting is not a luxury; it is a safety and accuracy requirement.
Safety Is Not Optional
Old electronics can be dangerous in subtle ways. Even small devices can store charge, and older televisions and radios can retain dangerous voltages long after being unplugged.
Basic safety rules:
- Always unplug before opening anything.
- Avoid working on powered devices unless you have proper training.
- Never touch exposed circuitry blindly.
- Do not open tube televisions or large power supplies unless you understand discharge procedures.
- Remove jewelry and watches to avoid accidental shorts.
- Wear gloves and eye protection when working around springs, brittle plastic, or pressurized components.
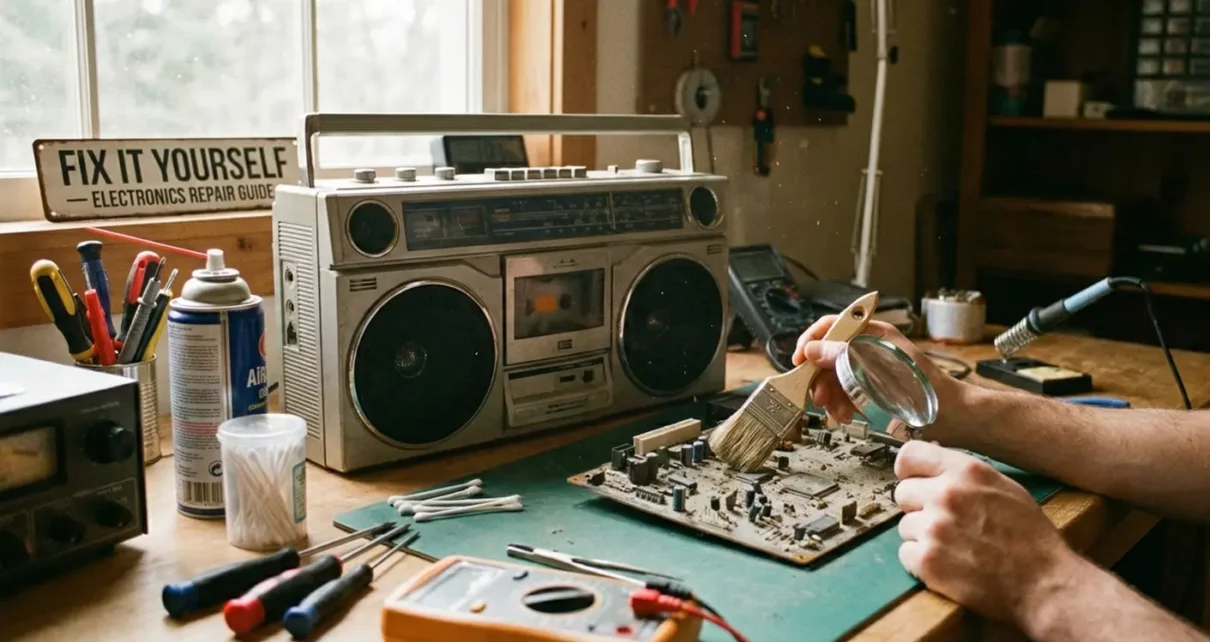
Start with Cleaning, Not Repair
One of the most common mistakes beginners make is assuming something is broken when it is merely dirty.
Dust can block ventilation, causing overheating. Oxidation can prevent electrical contact. Old grease can turn into glue.
Before replacing parts or disassembling deeply:
- Blow out dust with compressed air.
- Gently brush vents, fans, and open cavities.
- Clean battery compartments thoroughly, especially if there is corrosion.
- Use isopropyl alcohol on cotton swabs to clean contacts, buttons, and switch surfaces.
- Check battery terminals for bending or corrosion.
You will be surprised how many devices come back to life at this stage.
Check the Simple Failures First
After cleaning, look for the obvious:
- Loose wires or disconnected plugs inside the case
- Broken or stretched rubber belts
- Bent or broken battery contacts
- Cracked solder joints
- Jammed mechanical parts
- Foreign objects inside the device
Many failures are mechanical rather than electrical. A cassette player that will not play may simply have a loose belt. A radio that cuts out may have a dirty volume knob. Always assume the simplest explanation first.
Finding Documentation and Community Knowledge
While original manuals are often missing, the internet has become an informal archive of technical history. Look for:
- Manufacturer manuals (often scanned as PDFs)
- Repair guides on platforms like iFixit
- Forum discussions for specific models
- YouTube videos showing disassembly or repairs
Search using the exact model number printed on the device. Even similar-looking models can have entirely different internal layouts.
Documentation not only tells you what to do, but also what not to do – which parts are fragile, which screws hold tension, and which cables must not be pulled.
Knowing When to Stop
One of the most important skills in electronics repair is knowing when to stop.
- You smell burning or melting plastic
- Components appear charred or cracked
- You encounter high-voltage sections you do not understand
- A repair requires specialized tools you do not have
There is no shame in seeking professional help. In fact, restraint often saves devices that overconfidence destroys.
Accepting Imperfect Outcomes
Not all repairs result in perfection. Sometimes a device works again but with limitations:
- A radio only picks up certain stations
- A tape player works but sounds slightly warped
- A button must be pressed “just right”
- A display flickers faintly
These imperfections are part of the story of the device. They reflect age, history, and use. The goal is not perfection; it is functionality and continuity.
Why This Matters
Repairing old electronics is not just about saving money or avoiding waste. It is about preserving continuity between generations of technology and people.
When a grandparent’s radio works again, it is not just a device – it is a memory restored. When a cassette player spins again, it carries voices, music, and moments that digital replacements cannot replicate.
In a world built on constant upgrades, repair is an act of quiet resistance. It says that value does not disappear just because something is old.
Final Thoughts
Approach old electronics with patience, curiosity, and respect. Start with cleaning. Assume simple failures. Learn from documentation and others. Protect yourself. Accept imperfection.
Sometimes you will succeed brilliantly. Sometimes you will fail gently. Both outcomes are part of the process. But every attempt extends the life of something that once mattered and often still does. And that, more than flawless functionality, is what makes repairing old electronics worthwhile.
7 Tips for Building Compact and Efficient Electronic Circuits
Designing Electronics for Harsh Kitchen Environments: Heat, Oil, and Moisture
Run Your Electric Heater Efficiently and Stay Cozy This Winter
