Dear friends, in this post I’ll guide you step by step about interfacing ESP32 with SG90 servo motor. It is very similar to interfacing the SG90 servo motor with the Arduino board. So without wasting time let’s get started, first I’ll tell you what are the important component that will required to complete this entire work.
Hardware & Software Components:
- SG90 Servo motor
- ESP32 Module
- Jumping Wire
- Arduino IDE
SG90 Servo Motor Pin Configuration:
A typical micro servo 9g sg90 has 3 terminals with 3 different colors, a brief description is given in the below table, read it carefully it will really help you while doing circuit connection.

Circuit Connection of ESP32 with servo:
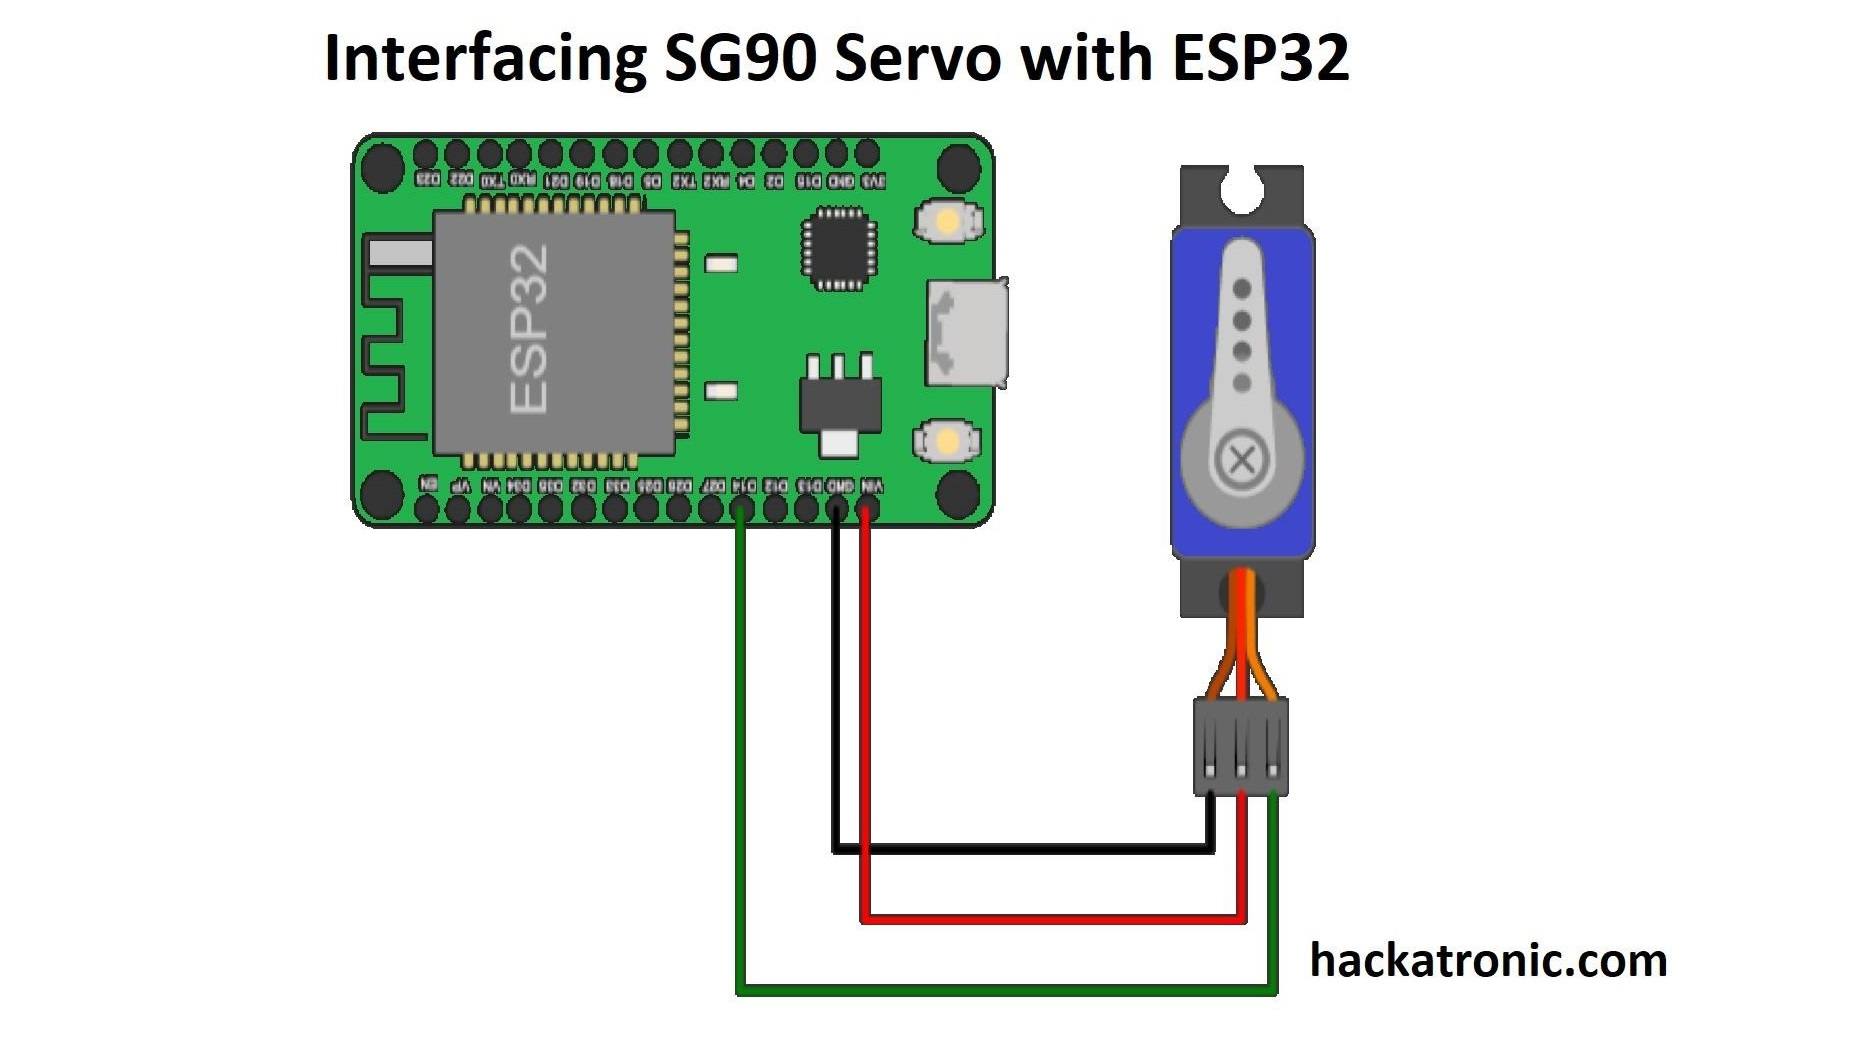
Now let’s start circuit connection (or interfacing) with the ESP32 Module, we will use ESP32 GPIO pins for PWM signals. refer to the figure for circuit connection.

As you can see in the picture the ESP32 is powered using a USB cable via Laptop, and SG90 servo motor is powered using ESP32 Vs pin and SG90 should be grounded using any GND pin of ESP32 Module. The main PWM signal is given using GPIO pin G14 and the motor can be controlled by G14 pin of ESP32 Module.
Interfacing ESP32 with SG90 Servo Motor:

Code for ESP32:
#include <Servo.h>  //installed Servo library

static const int servoPin = 14; //PWM is appied to SG90 Servo motor

Servo servo1;

void setup() {
Serial.begin(115200);  //Buadrate
servo1.attach(servoPin);
}

void loop() {
for(int posDegrees = 0; posDegrees <= 180; posDegrees++) {
servo1.write(posDegrees);
Serial.println(posDegrees);
delay(20);
}

for(int posDegrees = 180; posDegrees >= 0; posDegrees--) {
servo1.write(posDegrees);
Serial.println(posDegrees);
delay(20);
}
}
Kindly refer above video as the setup is correctly working fine.


hvorfor bruges når det er esp32 er det ikke der skal bruges ,når jeg oploader koden bliver den ikke godkent hvis jeg bruger ?
The code is working