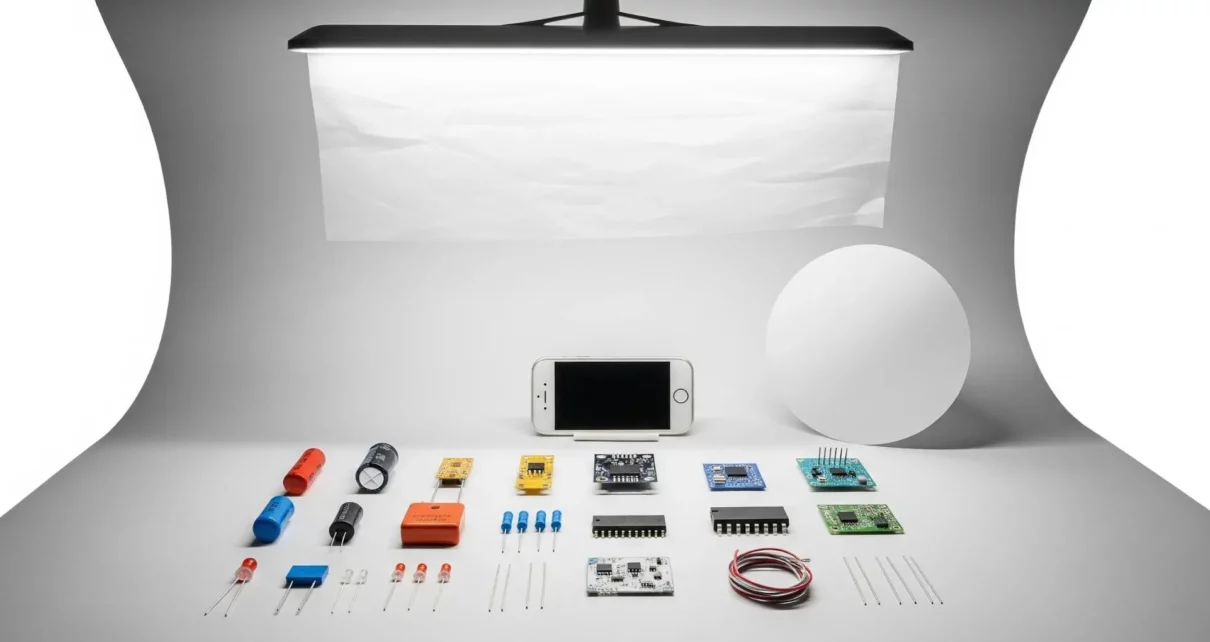
When selling electronic parts on the Internet, whether they are in the form of resistors, capacitors, PCBs or circuit boards, we all understand that product photos can either break or make a sale. Professional photography equipment and services may be in hundreds or thousands of dollars. Those costs can seem unjustifiable when you are operating with a lean operation.
Good news? Creating product photos with a professional style without having to dig through your pocket is certainly possible. With the right approach and smart techniques, you can get fantastic images at half the cost.
Understanding the Challenge
Photographing electronic components is hard to master since they are tiny bits usually with reflect on their surface which requires clear and detailed photography. Classic product photography often requires vertical lenses and difficult lighting setups. That is over unless we got the technology and ideas that can allow us to explore without the old-world costs.
The Smartphone Solution
We can begin with what you are likely to already possess, your smartphone. The current smartphone cameras are highly advanced and can produce good product photographs with proper usage.
Lighting is everything. The most appropriate free lighting source is natural light through a window. Place your parts by a window when the sun is not shining, not in the bright sun, which makes terrible shadows. A plain white poster board that is placed facing the window is used as a reflector, and the light bounces back to your subject. This arrangement would cost less than ten dollars.
A plain white surface such as paper or foam board should be used as your background. This gives it that business, undistracted appearance desired by the buyer. To remain stable, you can improvise using books or boxes which can be stacked to stabilize your phone during the shooting process.
Leveraging AI-Powered Solutions
The recent developments in the artificial intelligence have opened up new opportunities in the photography of products. Product photography generator can automatically enhance and remove the background of the photos captured with a simple smartphone device and transform it into a high-quality and professional image.
These AI applications process your image and do advanced professional adjustments to light, color, and brightness. Although there are premium versions, most of them have free options with considerable power to use in small-scale usage.
All one needs to do is take a clear photograph that has good light, upload it and the rest is done by the AI. In few seconds, you will have professional quality images. This works well even when the category of the business being dealt with is large and the cost does not have to rise accordingly.
DIY Light Box for Consistent Results
Another good low-cost alternative is a basic light box. Light box enhances uniform lighting which gets rid of harsh shadows and reflections- perfect in electronic components.
With less than twenty dollars in the form of a cardboard box, white tissue paper, and white poster board, you can make one. Draw huge windows on three sides with huge window that is covered with diffusion material, and place poster board on the inside. Install lamps against the windows and you have an instant photography studio that can be depended upon to give the same results on hundreds of parts.
Strategic Planning is Cost-Effective.
When you plan your photography, you will be able to take photos at various assembly processes in case it is necessary. When you shoot all in one well-organized session it is much more efficient than having to set up a photography room over and over again.
It is much more time and cost saving to think about documentation requirements when dealing with electronic parts, especially custom PCBs. The PCB Cost Calculator is useful to you when you are in the design phase because it allows you to know the cost of manufacturing upfront, but you should also design the visual documentation.
Exploring 3D Rendering
The unexpected tactic here is that, at times, the most cost-effective method of producing product images is not to photograph them at all. In the case of components that are still being developed or have been manufactured in different variations, a 3D models generator will give a realistic photorealistic image without the need to have actual samples.
It is very effective with standardized components. Fabricate or get a 3-dimensional model, lighten and texture it and you have a flawless product image. This is available in the form of free tools such as Blender with tutorials available online.
These benefits are substantial. Want your part displayed in ten different angles? Simply rotate and render. Want five different colors? Alter material qualities and re-render. This flexibility is invaluable for catalogs with multiple variants.
Batch Processing Maximizes Efficiency
No matter which approach you choose, one way or another batch processing enhances cost-efficientness significantly. One time is enough to set up your photography space and then take all the required elements in one shooting. This reduces the time of setup and guarantees uniformity.
Develop a checklist of necessary angles of every component type. Most requirements are usually met by front view, side view, top view, and one detail shot. Processing per-item photography item costs are reduced significantly.
Post-Processing on a Budget
Even brilliant original photographs do not go without editing to make them look professional. You do not have to spend money on costly software. There are free programs such as Gimp, Photopea, or smartphone editing programs that offer necessary functionality.
Pay attention to the most important changes: adding a little brightness, adding clarity to improve the detail, adjusting the white balance, and eliminating distractions with the help of cropping. Make all the product photos consistent.
To erase the background in that floating on white appearance, this can be done with free web tools in a few seconds. This one action turns mediocre photos into professional photographs.
Making Your Choice
The best alternative is the cheapest one, but that is according to your situation. With a few parts, the natural light using custom-made reflectors is practically free. A light box that costs 20 dollars and AI enhancement tools is a more valuable purchase when it comes to catalog building that includes dozens of items. To manufacturers in the design stage, 3D rendering may be the most cost-saving aspect since there is no need to do physical photography.
Final Thoughts
A professional budget is not necessary to create product photos of electronic components in a professional way. No matter which smartphone lighting option you use, assemble a light box yourself, or use AI enhancing tools, or 3D rendering, one can get spectacular outcomes with a minimum of investment.
It is not about spending money; it is about basic knowledge and the use of these basics in a creative way on the available resources. Keep it simple, concentrate on lighting and sanitation, be consistent, and as time goes on improve what you are doing depending on outcomes.
Types of Resistors with Symbol, Classification and Applications
Types of Capacitors with Symbol, Classification and Applications
